How to Setup Xerox Scan to Folder on Windows
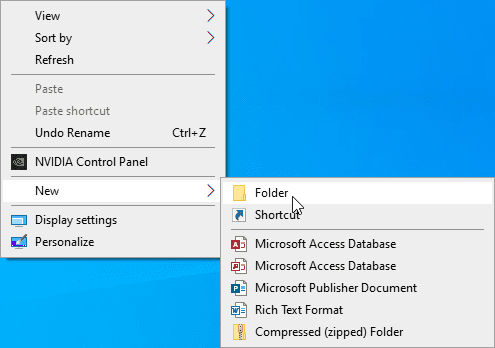
1. Right-click a blank space on the desktop and go to “New”, then select “Folder”.
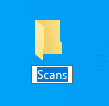
2. Name the folder “Scans”
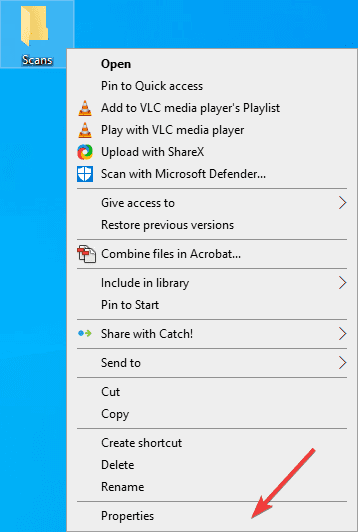
3. Right-click the folder and go to “Properties”.
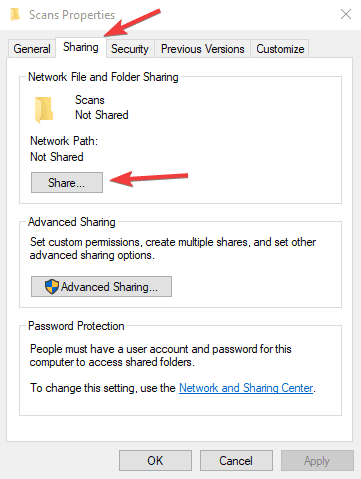
4. Go to the “Sharing” tab and click the “Share” button.
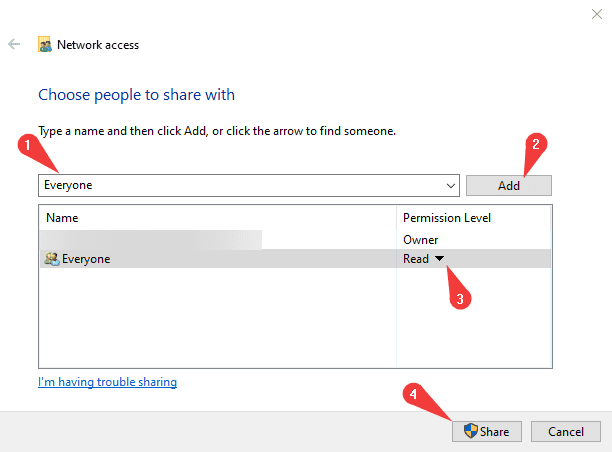
5. In the drop-down at the top, choose “Everyone” from the list and click “Add”. Then, at the “Permissions Level”, click the down arrow and select “Read/Write” and then click “Share”.
5a. If you get a login prompt when clicking the “Share” button, you will need to input the admin credentials for the computer or contact your IT department for further assistance.
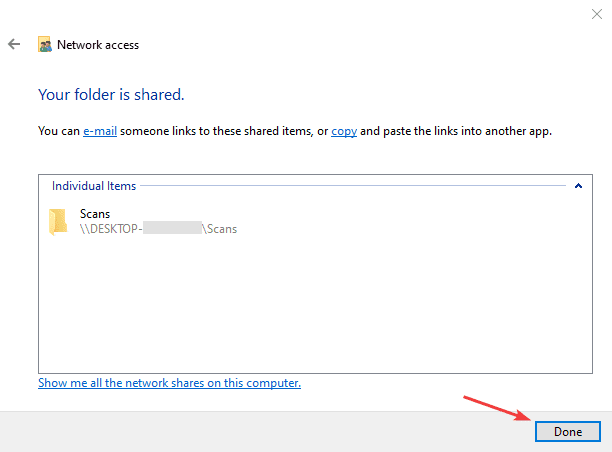
6. Click “Done” to finish the file sharing.
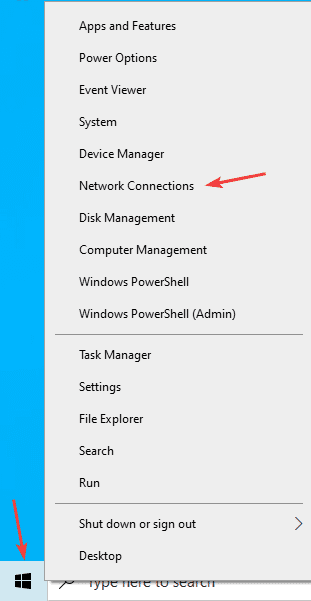
7. Right-click the “Windows” icon at the bottom of the screen and click “Network Connections”.
8. Click the “Properties” button under the current network connection.
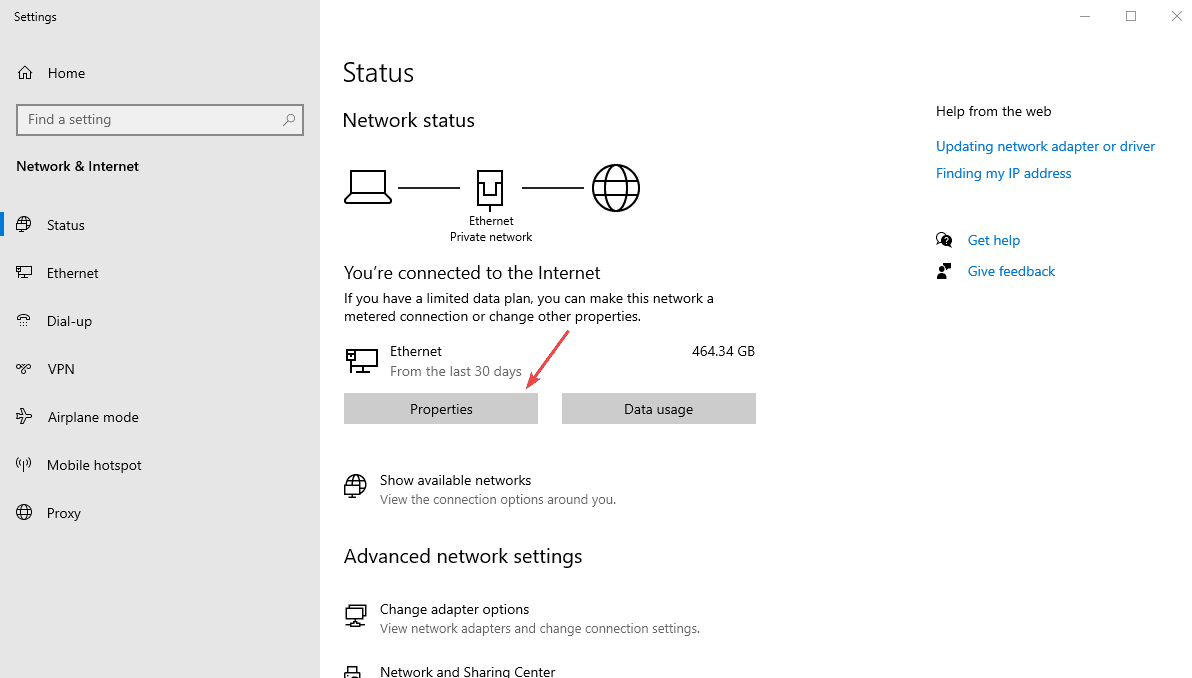
9. Select the “Private” bubble and then close the window.
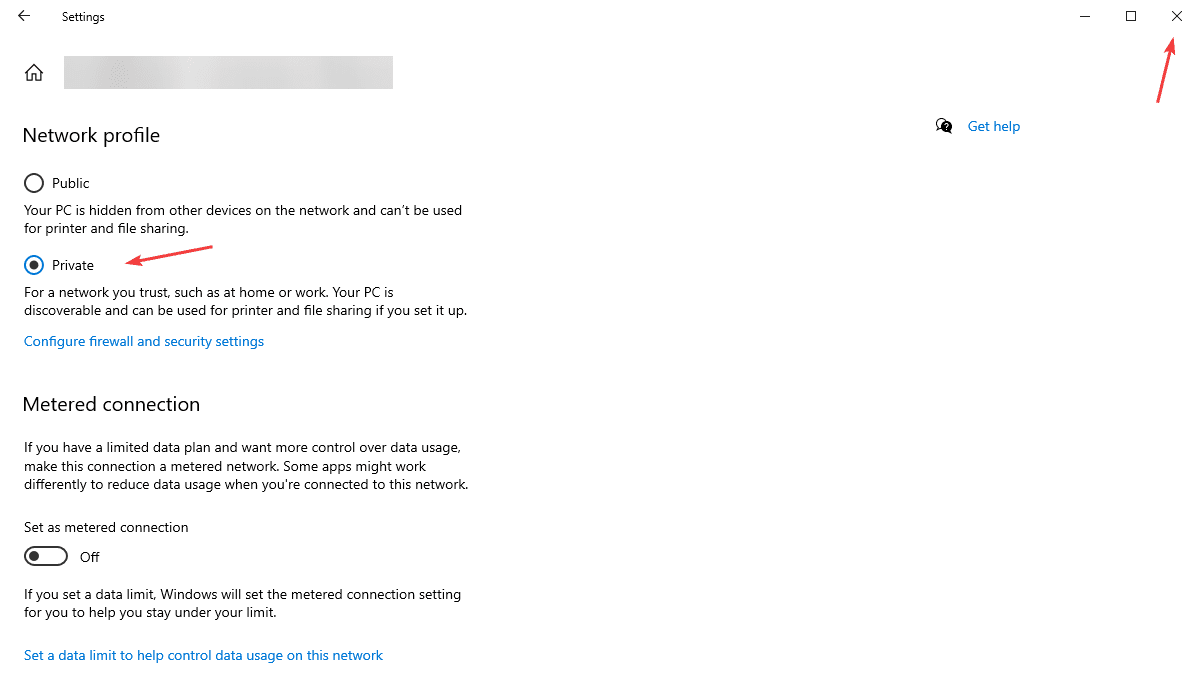
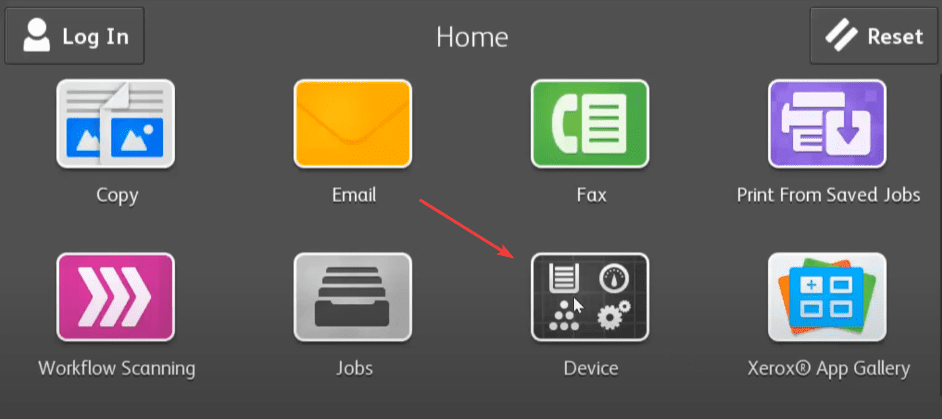
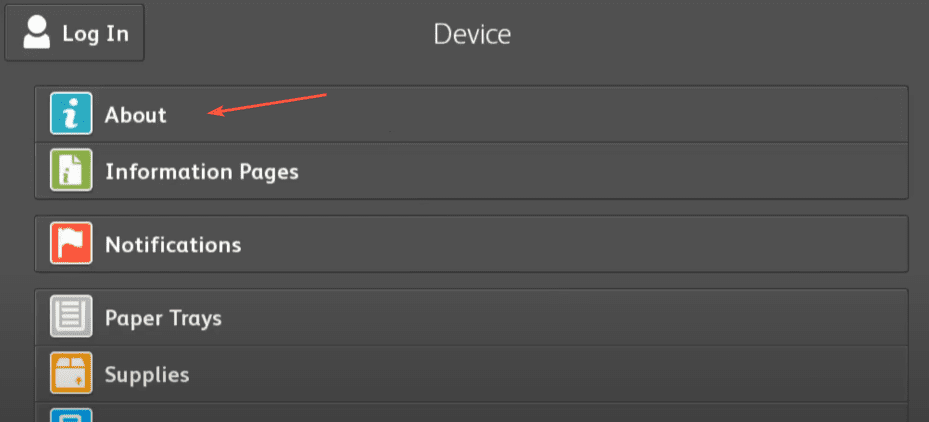
10. Go to the physical copier and press the “Machine Status” button and then, under the “Machine Information” tab, find the IP address. On some models, you will have a “Device” button on the main screen and then “About” and the IP is at the bottom.
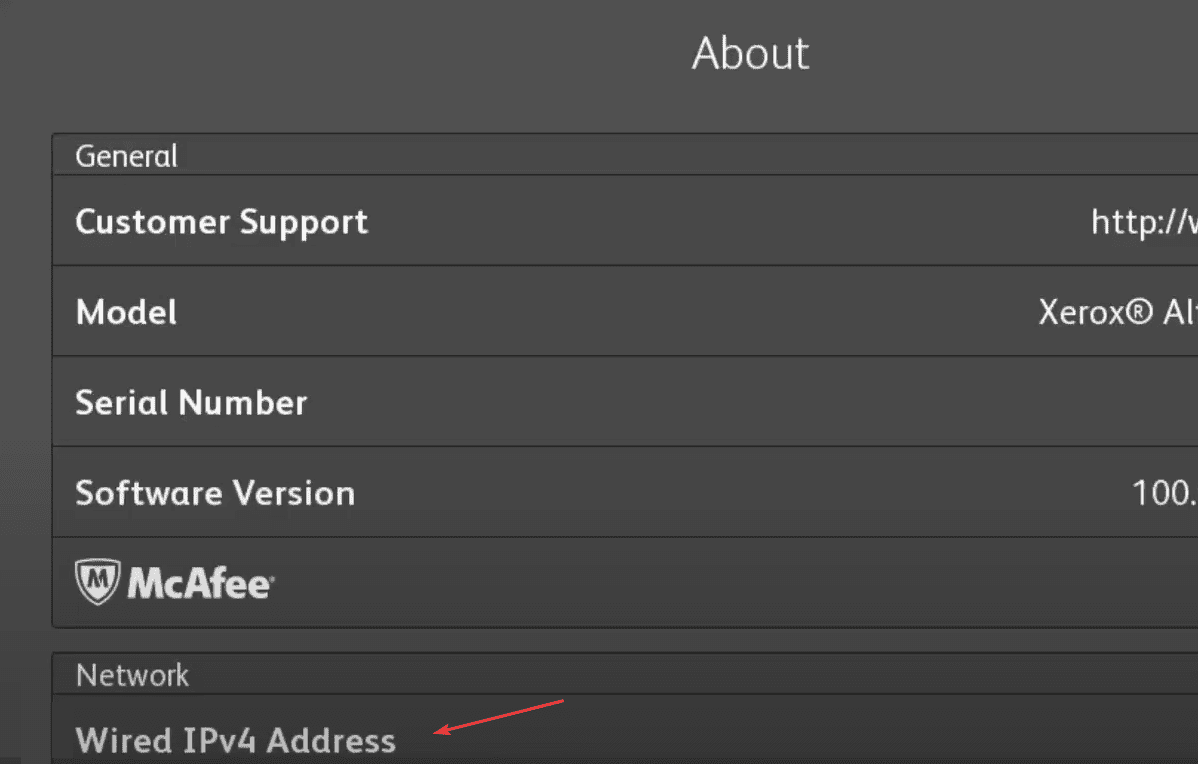
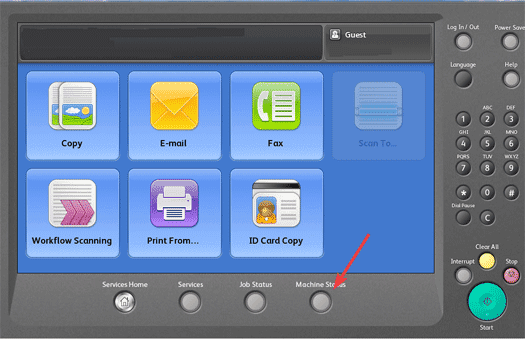
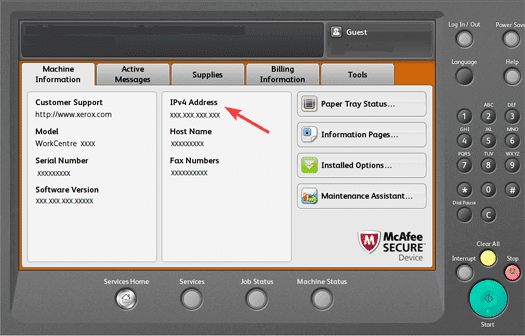
11. Type the IP address of the copier into a new tab in your web browser at the top of the screen, not the search bar, and hit enter.

12. Click the “Login” option and then input the username and password.
12a. The default login is “admin” for the username and “1111” for the password. On some models, you may need to use the serial number for the password, which can be located on the back of the copier.


13. After signing in, press the “Scan” tab at the top of the screen and then click “Create new Workflow” or “Create new template” depending on your copier version.
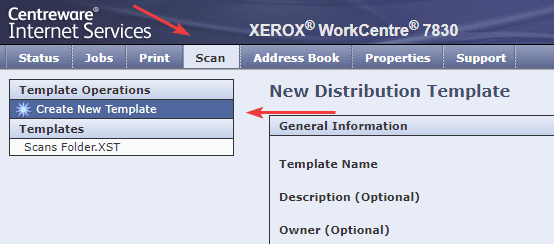
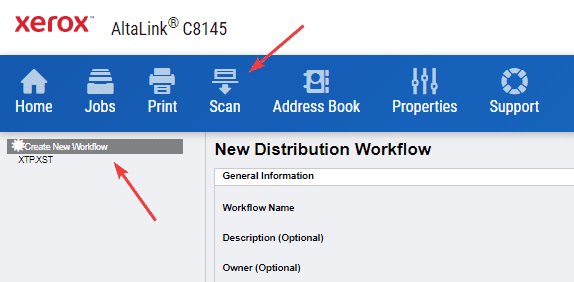
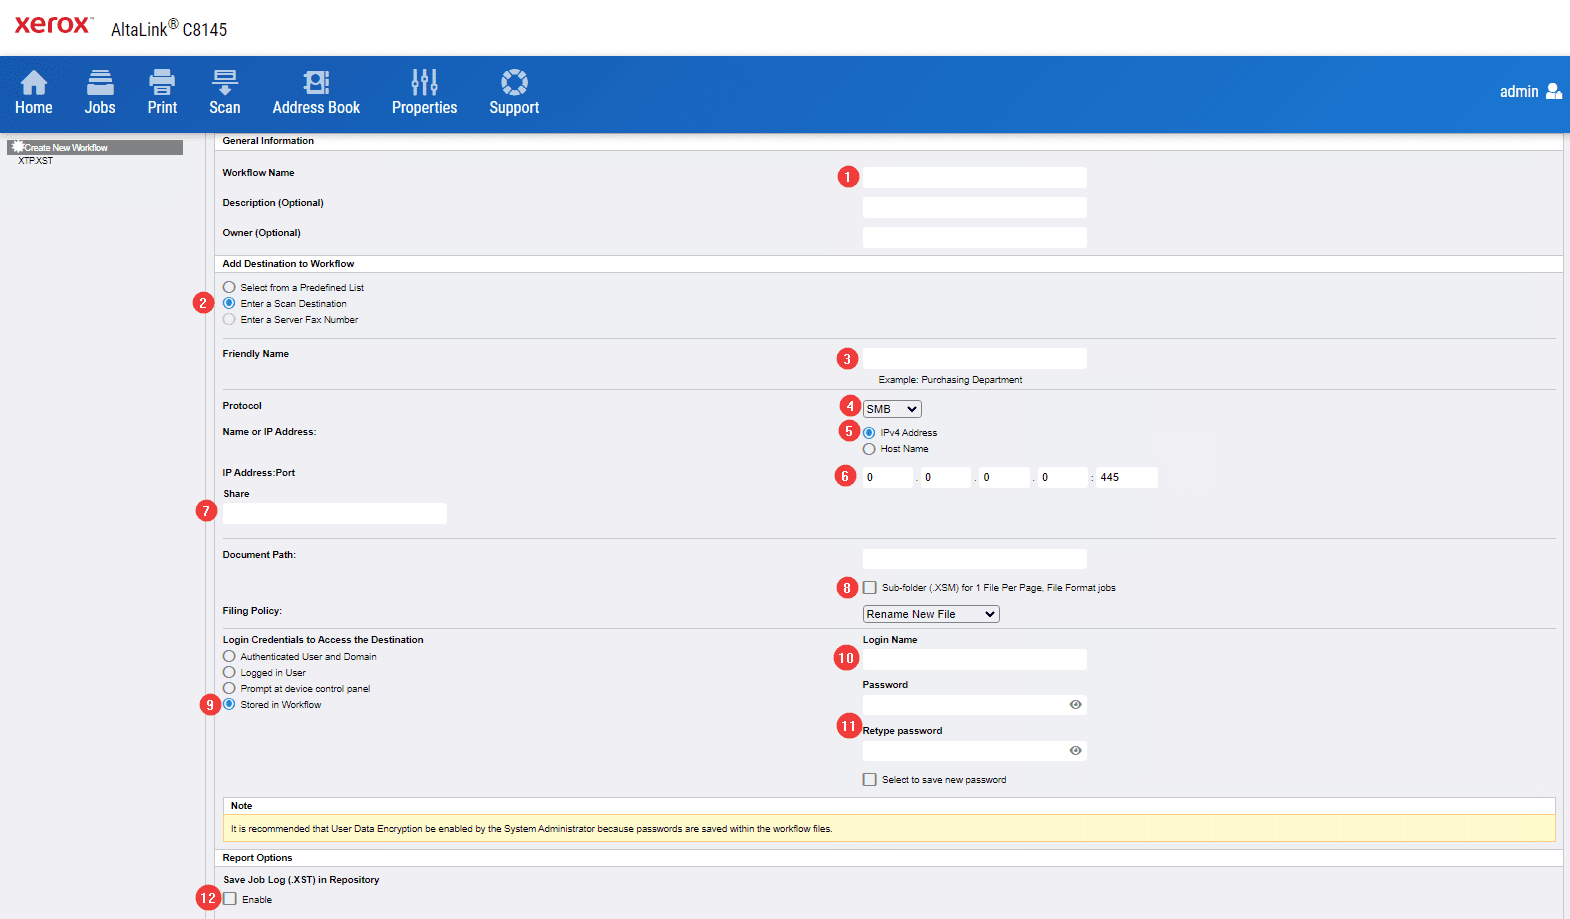
14. Follow the steps below to fill out the page and then once you are finished click the “Add” button at the bottom.
14a. Give the template a name (typically the name of the user).
14b. Select “Enter a Scan Destination”.
14c. Give the template a “Friendly Name”. It cannot be the same as the “Workflow Name”.
14d. Click the dropdown and select “SMB”.
14e. Select the “IPv4” option.
14f. Type in the IP address of your computer.
14f.1. To find the IP address of your computer, right-click the “Windows” icon and click “Network Connections” and then click “Properties” and the IP is at the bottom.
14g. The share name will be “Scans”.
14h. Uncheck the box for “Sub-Folder”.
14i. Make sure the setting is “Store in Workflow” or “Store in Template”, depending on your copier.
14j. Type in your username for the computer.
14k. Type in your password for the computer. If you use a pin to access your computer, you will need to use the password as the pin will not work. Typically, the password will be the same as your email password.
14l. Uncheck the box.
