How can we help?
-
Canon
-
Sharp
-
Konica Minolta
-
HP
-
Xerox
-
Brother
-
Client Onboarding
-
NSight
- Articles coming soon
< All Topics
Print
How to Install a Sharp Printer on Windows
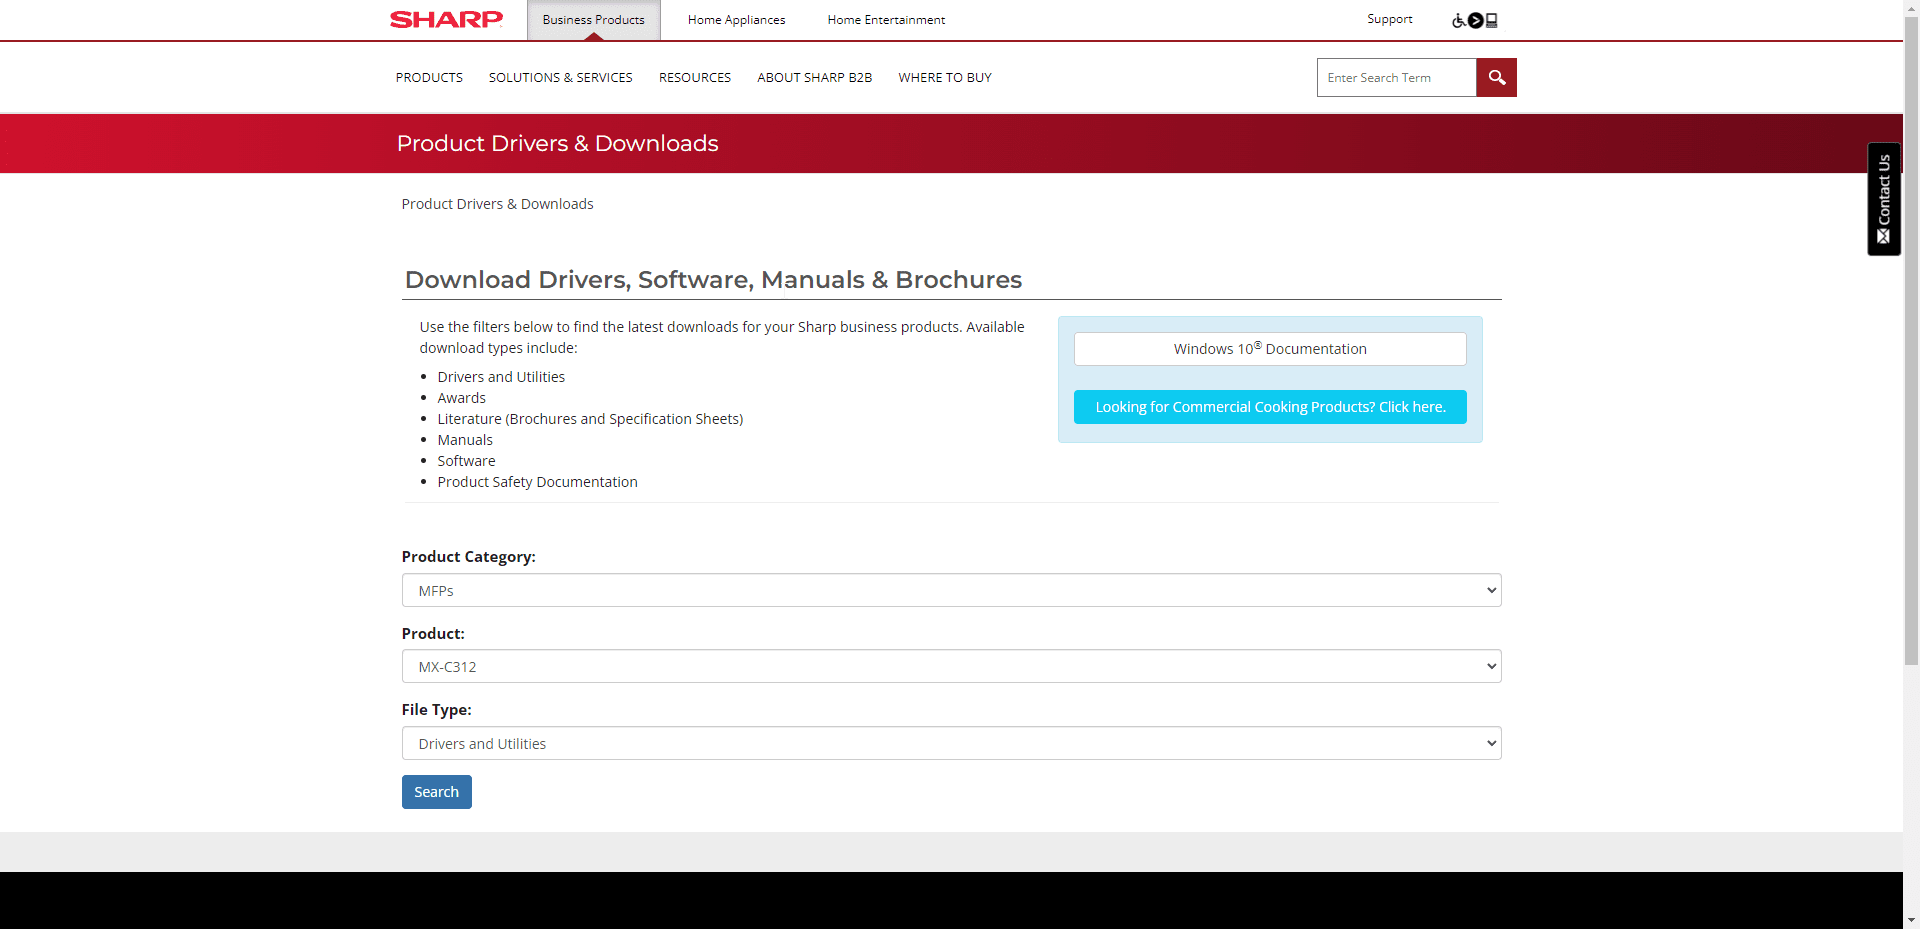
1. Navigate to the Sharp support website. In the first drop-down select “MFPs” then find your model in the list and in the “File Type” select “Drivers and Utilities” and click “Search”.

2. Click “Download” next to the option labeled “View all available driver downloads”.

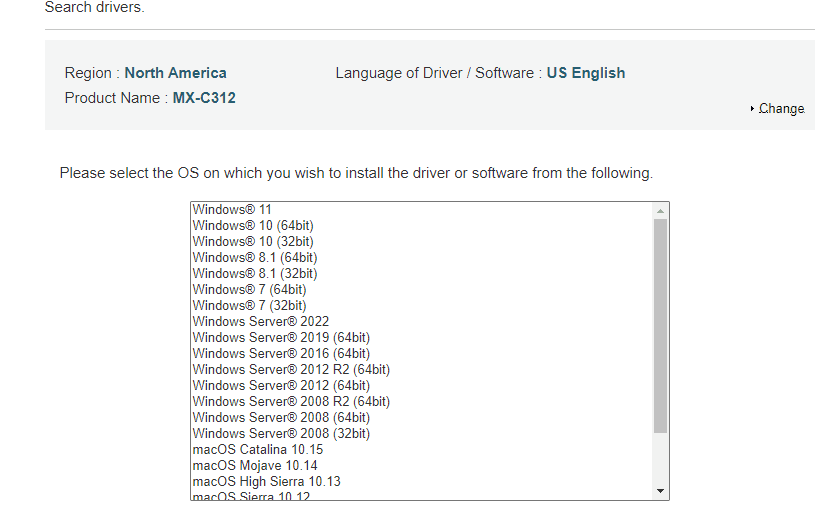
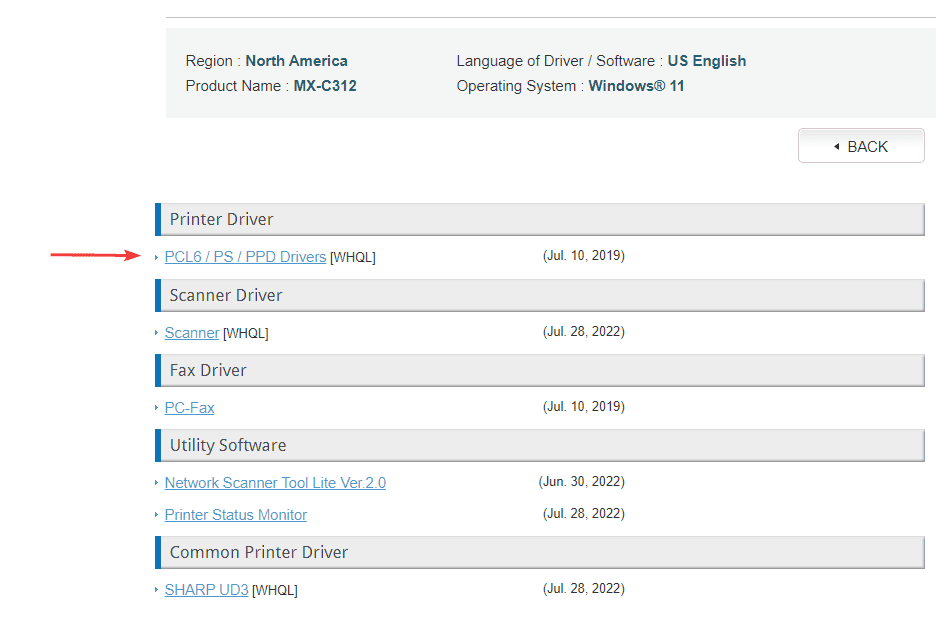
3. Select your operating system from the list and then link under the “Printer Driver” header.


4. Scroll to the bottom of the page and click “Download”.

5. Find your download in either the download folder or in your browser and run the exe file. Chrome puts the downloads at the bottom left of the screen, Firefox and Edge put it at the top right of the screen under the down arrow.
5a. If you run the file and get a pop-up for a username and password try the username and password for your computer, if that doesn’t work you may need to contact your IT department for further assistance.
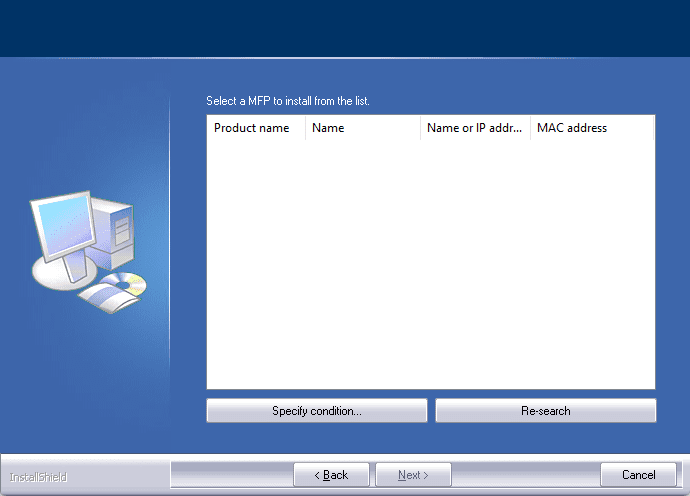
6. After you run the file you will get an installation window. Click “Next” and then click “Standard Installation”. The program should search and find the Sharp device and auto-select it for installation. Check the “Autoconfiguration” box and then click and then once it is finished click “OK”. If you have multiple Sharp devices you will get a list of them and you can choose the correct device and click “Next” to complete the installation.
6a. If it cannot find your printer you can click “Specify Condition” and type in the IP address of the copier to have it manually search for it. If it still cannot find the copier you might be on a different network than the copier so double check you are connected to your work’s wifi if you are using a laptop or device with a wireless connection. If that still doesn’t work you will need to contact your IT department for further assistance.

Table of Contents