How to Setup Scan to Email on Konica
1. Go to the copier and press the “Home/Menu” button. On the screen, press the “Utility” option, then press the “Device Information” option and write down the IPv4 address.
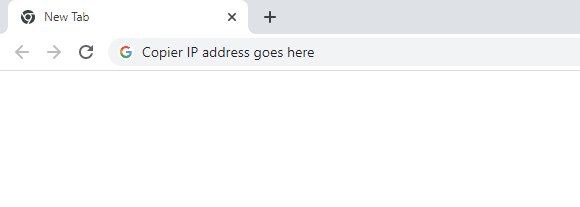
2. Open a new tab in your web browser, type in the IP address of the copier, and hit enter.
3. If you have a login screen, you can skip to the next step.
3a. If you get a screen with a “Logout” option or “To Login screen” at the top of the screen, click it and then click “OK” to log out.


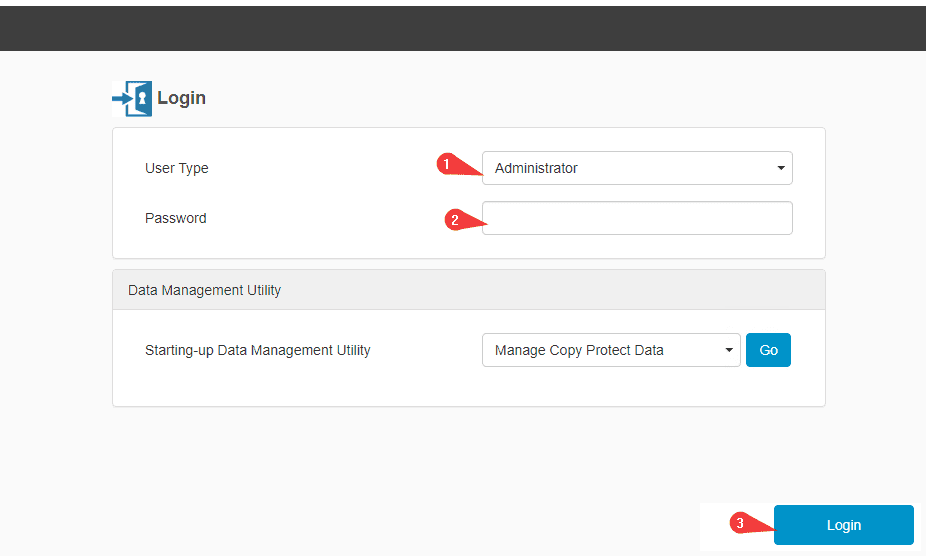
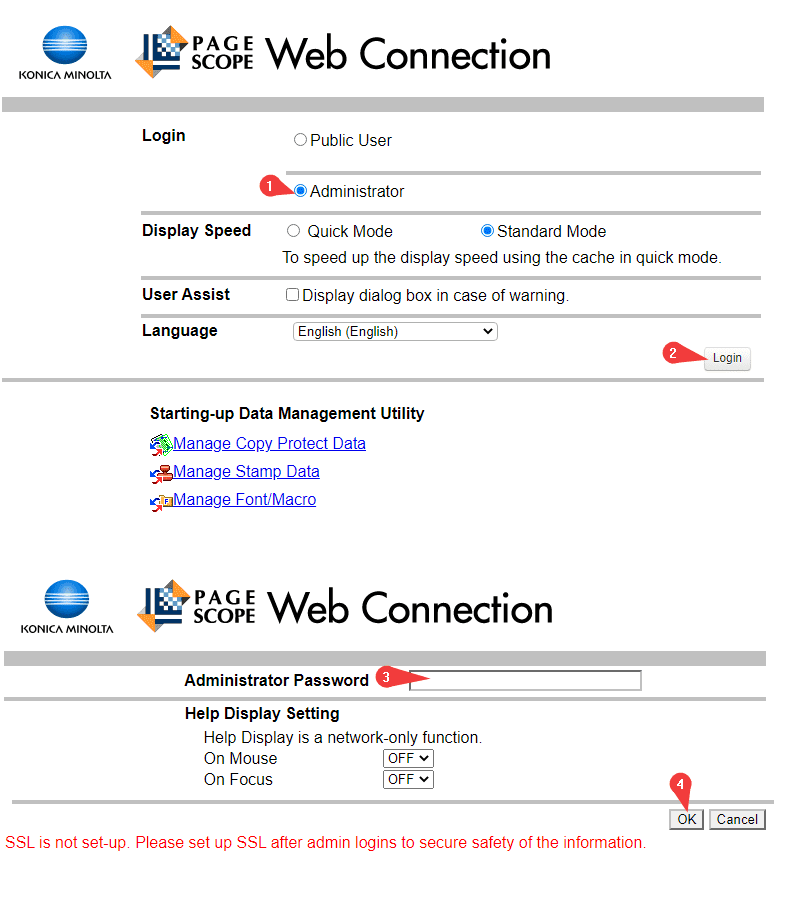
4. Follow the example that matches the screen you have.
4a. The default login for the copiers is “12345678” or “1234567812345678”. If this doesn’t work, try powering off and unplugging the copier and then rebooting it. If it still doesn’t work, contact your IT department as they may have changed it.
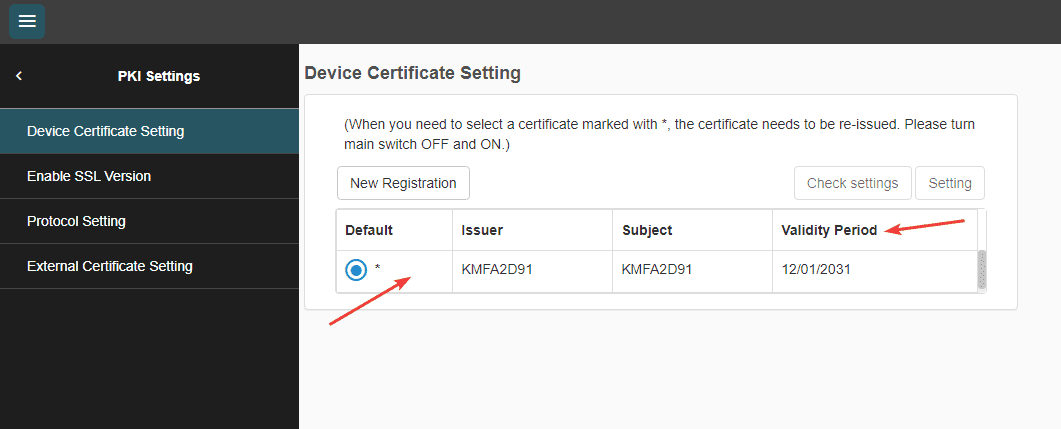
5. Go to the “Security” tab > “PKI Settings” > “Device certificate settings”. Make sure that there is a certificate in the list and that the “Validity Period” is still good and has not expired.
5a. If you do not have a certificate in the list you can click “New Registration”, select “Create a self-assigned certificate” fill out the form, and in the “Validity Period” section put 3650 and then hit “OK” to finish.
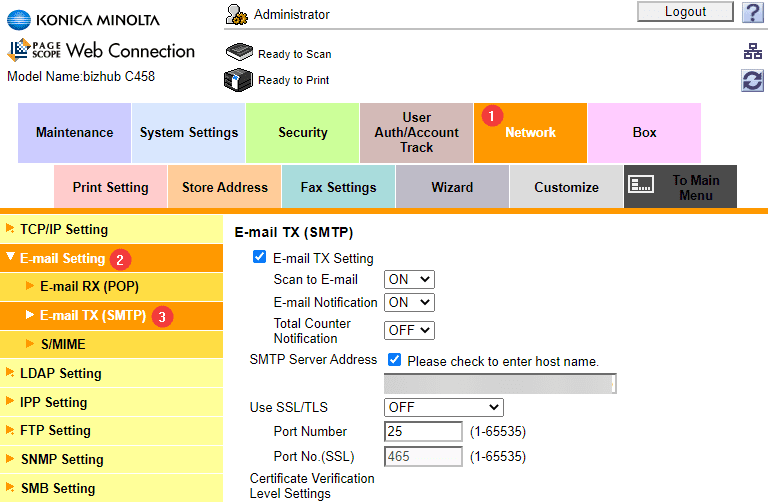
6. Click the back arrow until you are on the main screen again. Find and click the “Network” option at the top or on the left. Then open “E-mail setting” and then open “E-mail TX (SMTP)”.

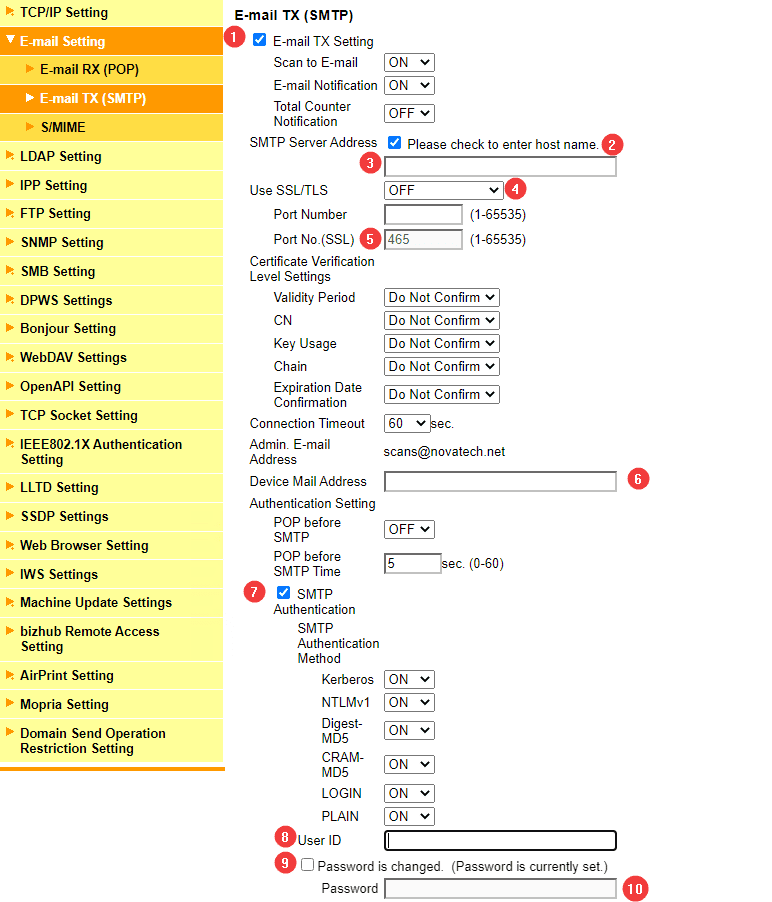
7. Follow the steps below to complete the scan to email setup. Listed below are the SMTP settings for a few of the major email providers. If you don’t have this information, you may need to reach out to your IT department or whoever supplies your email accounts.

7a. Make sure the “E-mail” setting is turned on.
7b. Check the box if it is not already checked.
7c. Type in the SMTP server address.
7d. Select the type of SSL/TLS the server uses.
7e. Use the port number from the doc above or what you received from your IT dept.
7f. Type in the email address you want the copier to use.
7g. Make sure this option is turned on.
7h. Type in the email address again.
7i. If your copier has a check box for “Password is changed”, check it.
7j.Type the password or app password for the email account.
7k. Click “OK” to complete the setup.

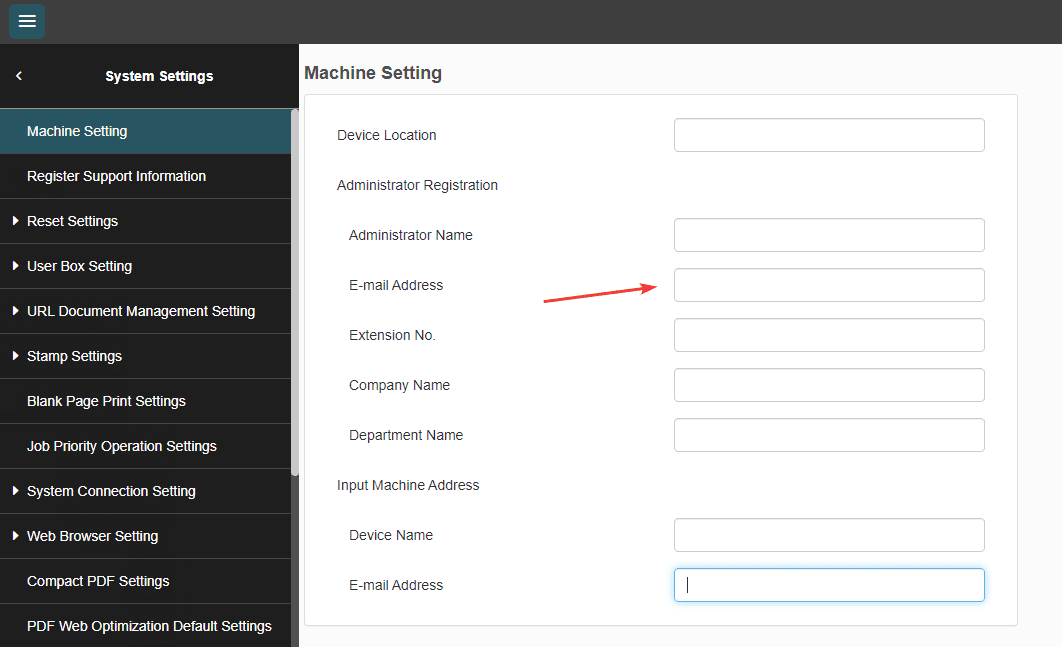
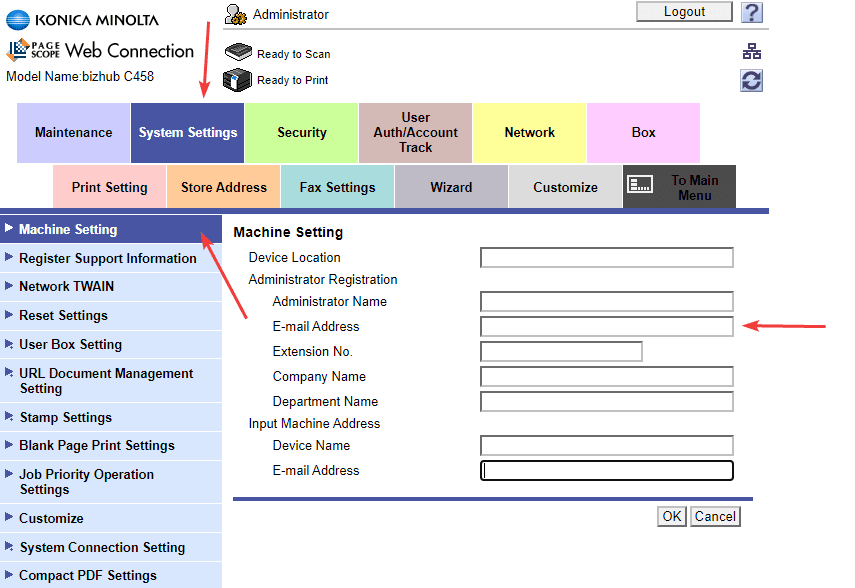
8. Click the back arrow until you get to “HOME”. Click “System Settings” and then “Machine Setting”. Make sure there is an email address in the field under “Administrator Name”.
