How can we help?
-
Canon
-
Sharp
-
Konica Minolta
-
HP
-
Xerox
-
Brother
-
Client Onboarding
-
NSight
- Articles coming soon
< All Topics
Print
How to Add And Delete Users From Canon Address Book
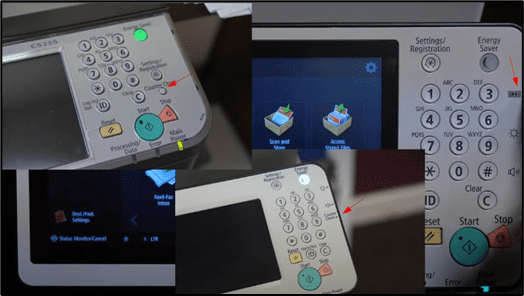
1. On the copier, press the “123” or “Check Counter” button and write down the IP address listed at the top of the screen.

2. Type the IP address of the copier into a new tab in your web browser at the top of the screen, not the search bar, and hit enter.

3. Log into the copier webpage.
3a. The “Manager/Dept ID” will be “7654321” and the pin will be “1234567” or “7654321”.
3b. If you have a Username/Password instead, then the username is “Administrator” and the password is either left blank or “1234567”.

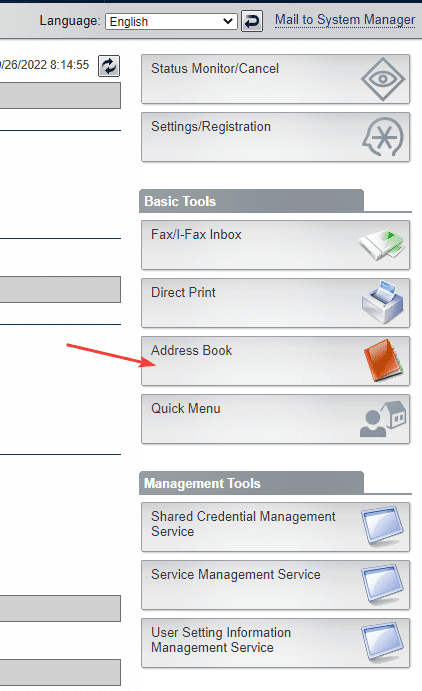
4. Once you are logged in, click the “Address Book” option at the right of the screen.

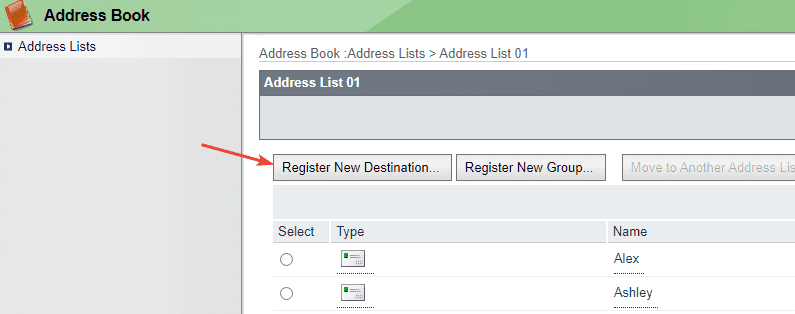
5. Once you open the address book, find the entry with the most “destinations” and open it.

6. You will either get a “Register New Destination” button at the top or be able to click a blank entry with a number to create a new entry to the address book.

7. Make sure the drop-down is on E-Mail and then fill out the information and click “OK” at the top of the screen.

8. To delete a user, select them from the list and then click “Delete Destination” at the top.

Table of Contents