How to Add And Delete Users From Konica Address Book
To add a user from the web portal instead of the panel, skip to step 5.
If you want to add/remove users in the address book from the panel, follow the steps below:
1. At the physical copier, make sure you are on the home screen and then press the “Address book” button.
1a. If you don’t have an “Address book” icon on your home screen, you might have a model that requires different steps. Please skip to step 4 for those instructions.

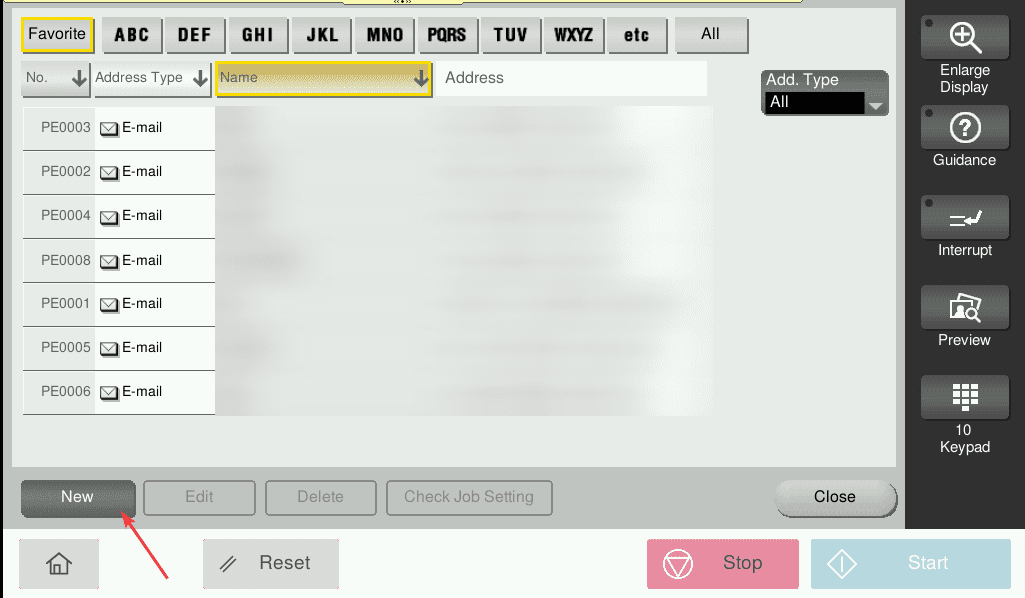
2. Press the “New” option at the bottom of the screen.
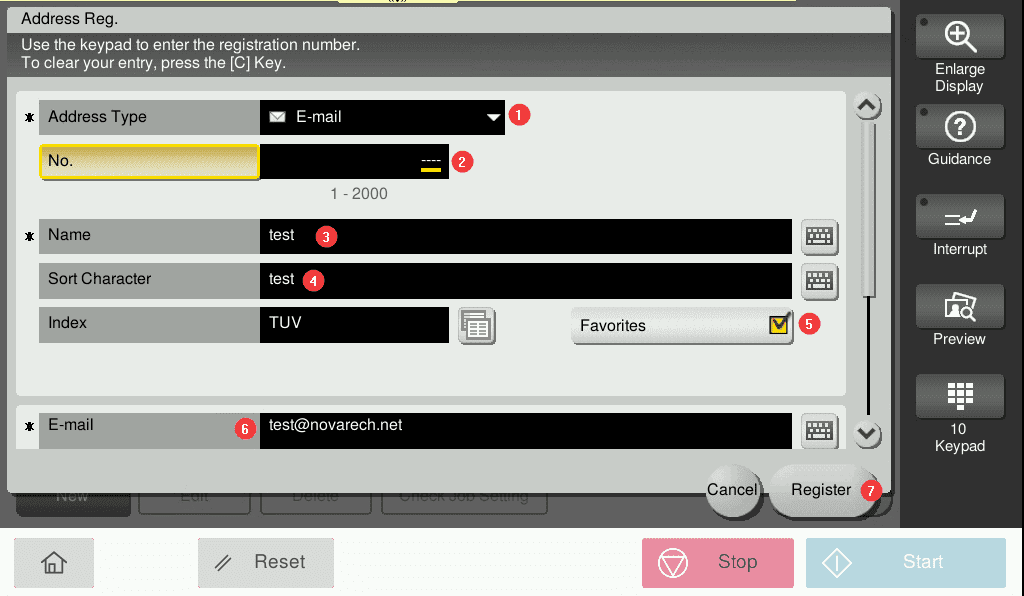
3. Follow the numbered steps below to complete the registration:
3a. Drop the “Address Type” down to “E-mail”.
3b. Leave the “No.” field blank, it will auto-fill with the next number in the sequence.
3c. Press the “keyboard” icon and then press the  icon to pull up the keyboard and type in the name.
3d. Leave the “Sort Character” defaulted.
3e. Check this box if you want the contact to show up in the favorites list when you select the address book.
3f. Press the “Keyboard” icon again and then press the  icon to pull up the keyboard and type in the email address. The “Shift” key will show the @ symbol.
3g. Once you have completed all the steps above, press the “Register” button to complete the entry.
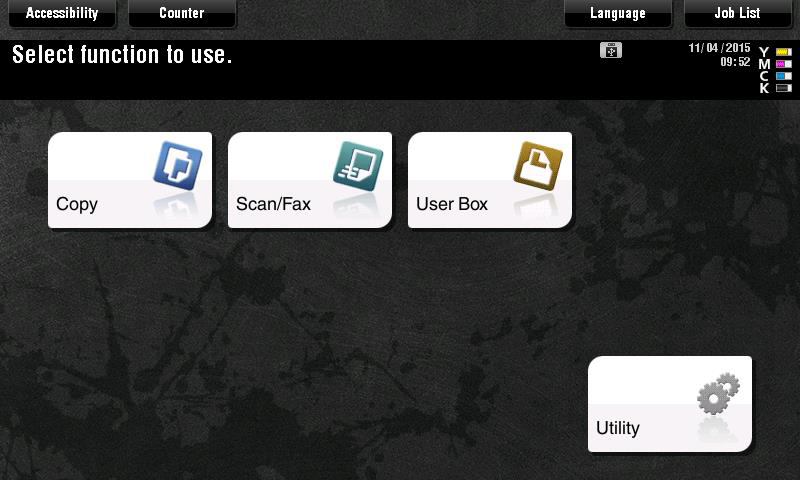
4. If you don’t have an “Address book” button on the home screen of your copier, you can follow the steps below:
4a. Press “Utility”.
4b. Select [1 One-Touch/User Box Registration].
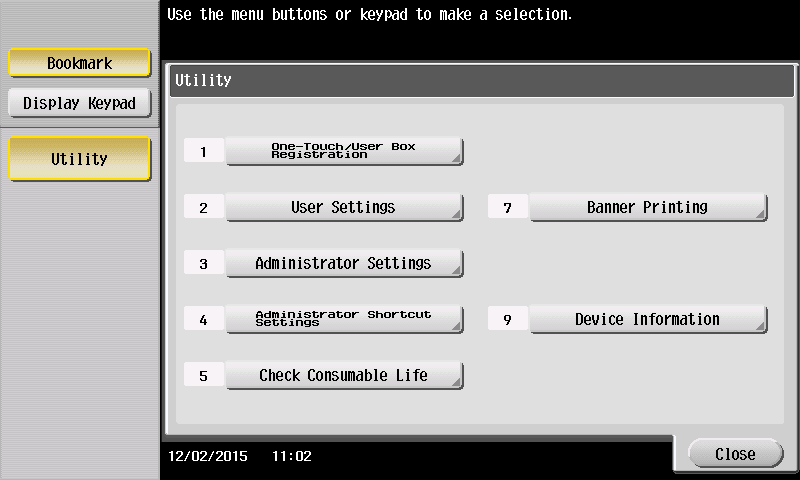
4c. Select [1 Create One-Touch Destination].
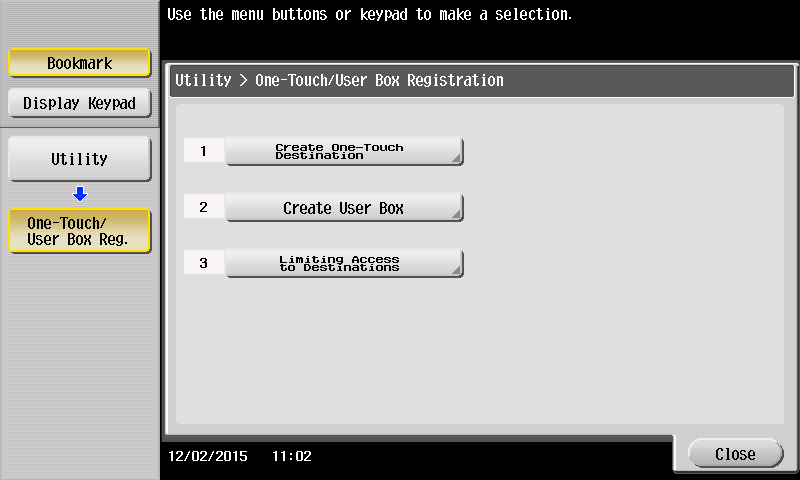
4d. Select [1 Address Book (Public)].
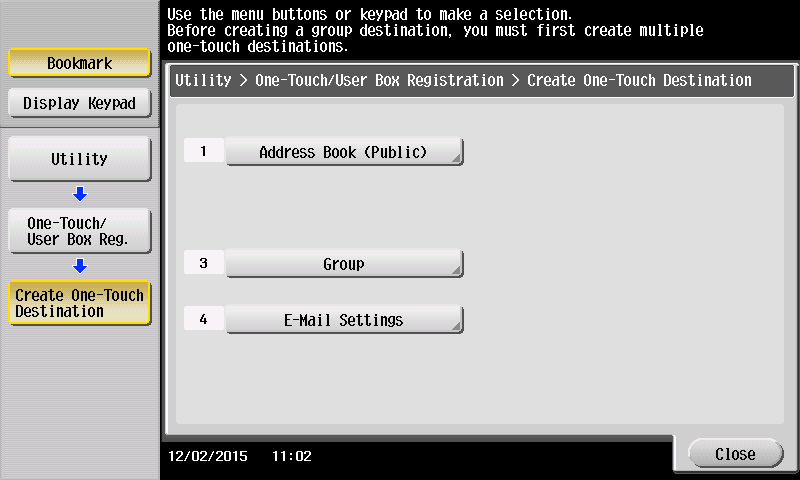
4e. Select [1 Email].
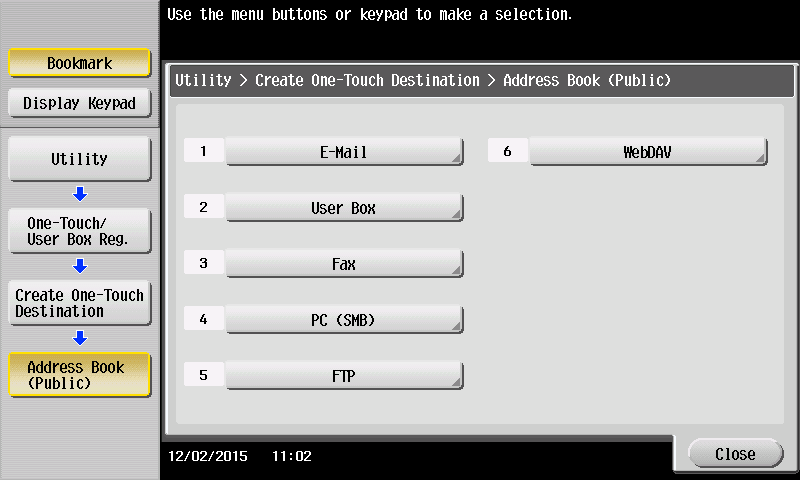
4f. Select New.
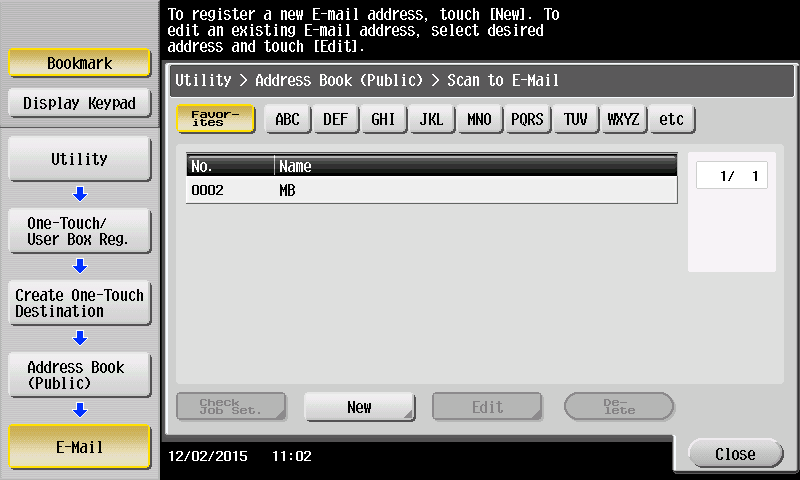
4g. Enter Name (how you want it to appear on one touch).

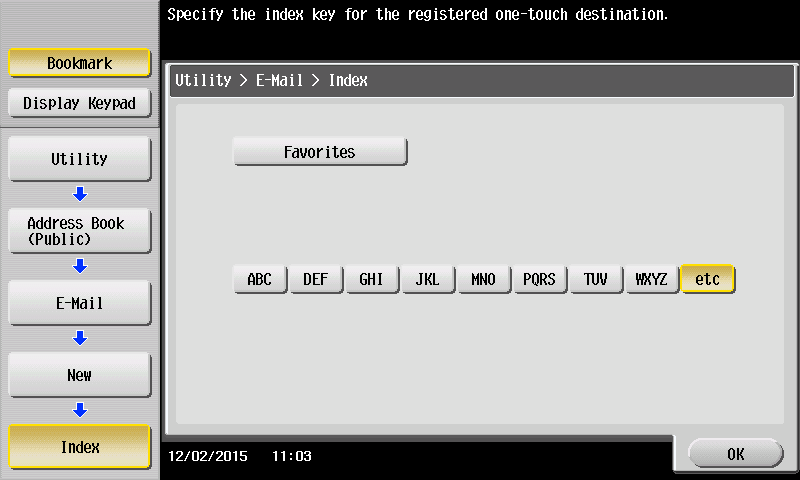
4h. When you select the index you will see the screen below. If you would like your one-touch to appear on the front scan screen, select FAVORITES and select an index button. Press OK.
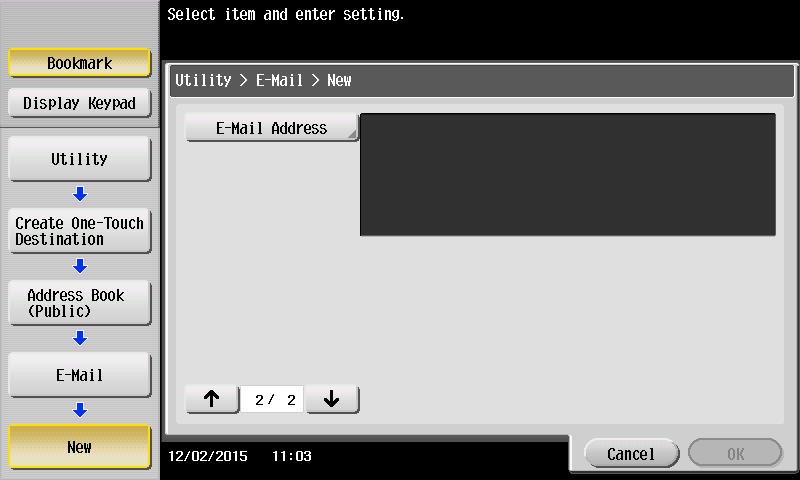
4i. Scroll down to screen 2, input your email address Select OK, and close windows until back to the main screen.
5. If you would like to add or delete users in the address book of the web portal, follow the steps below:
5a. Open a web browser on your computer and type the IP address of the copier into the address bar and hit enter.
5a.1 To get the IP address off of the copier, press the “Menu/Home” button, then press the “utility” option on the screen, then “Device Information”.
5b. If you have a “Logout” or “To login screen” at the top of the screen, you can skip to step 4.


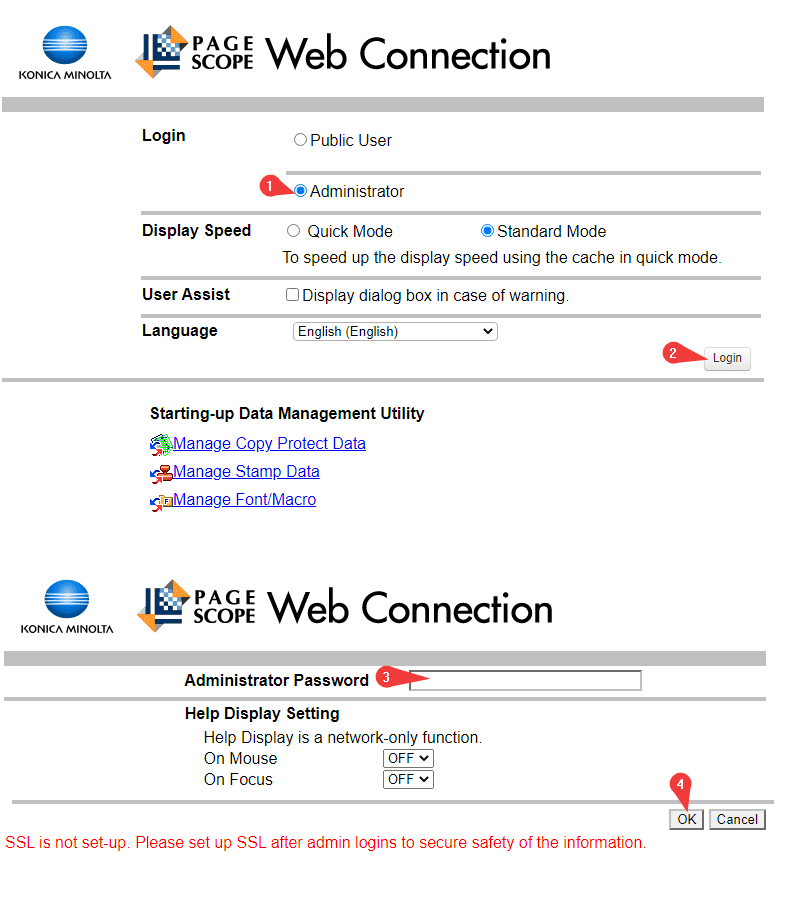
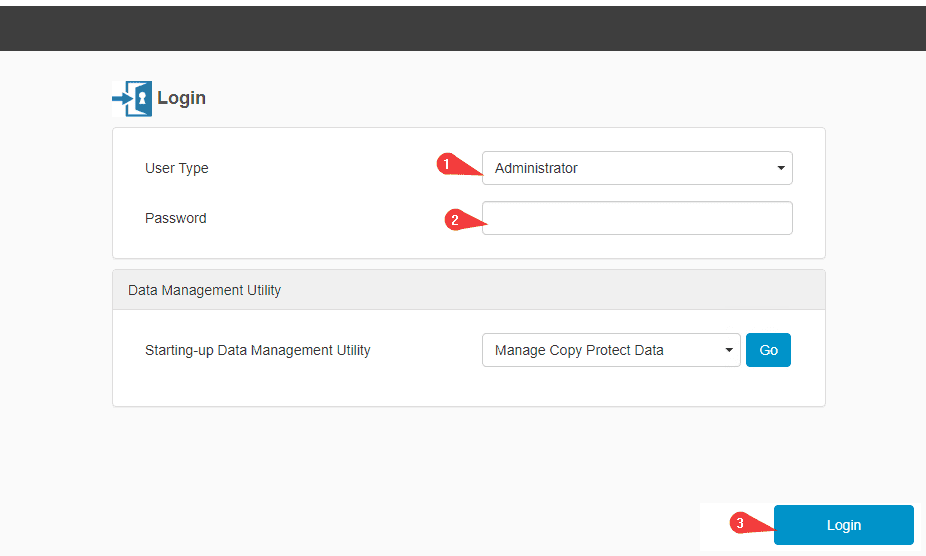
5c. On the login screen, follow the example that matches the screen you have. The default admin password is 12345678 or 1234567812345678.
5c.1. If neither of the passwords is working, try rebooting the copier. If it still doesn’t work, you might need to talk with your IT department to see if they have changed it.
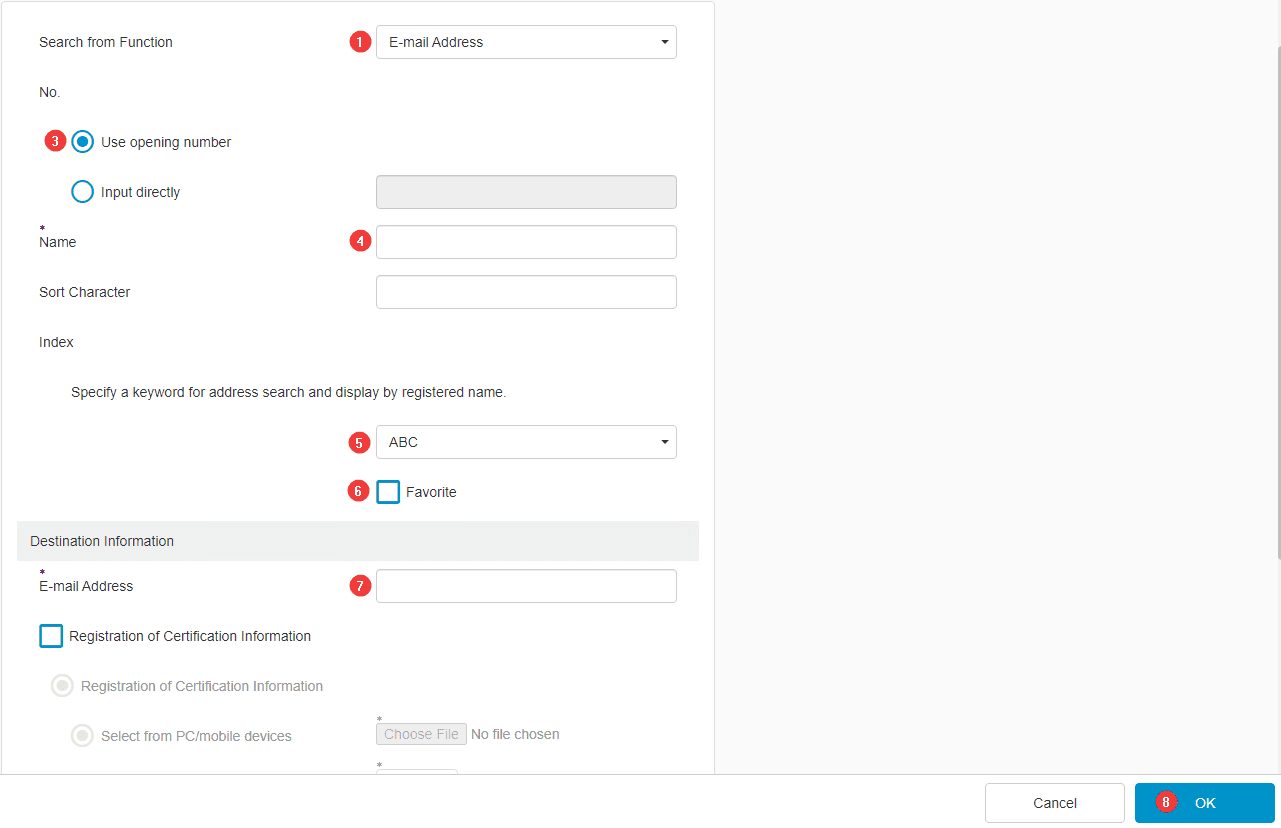
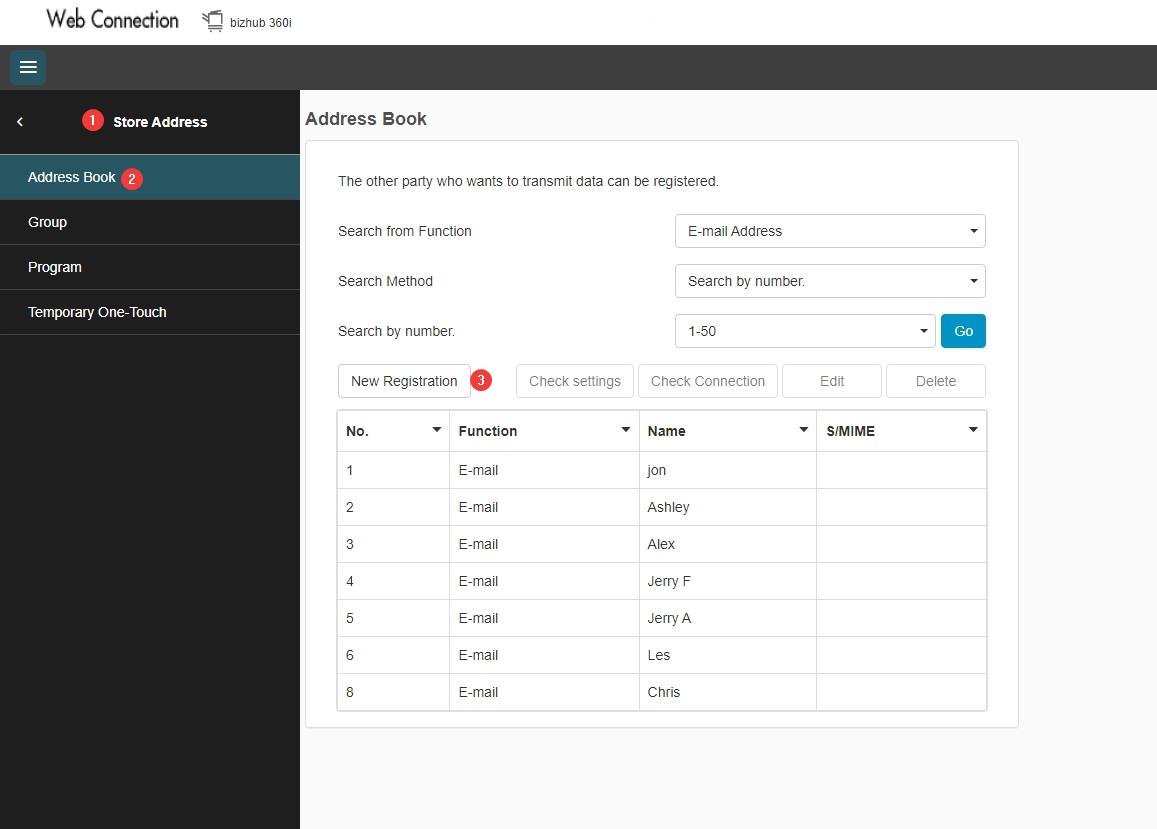
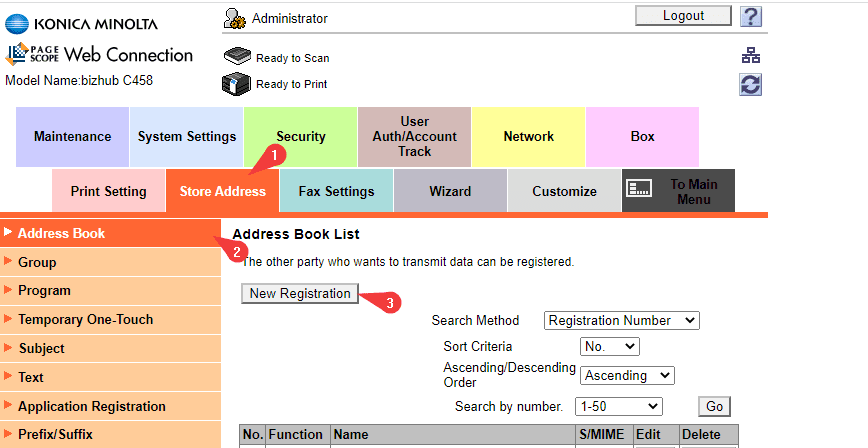
6. Click “Store Address” > “Address Book” > “New Registration”.
6a. If you would like to delete an entry from the address book, simply left-click the user and click the “Delete” button at the top of the screen.
7. Follow the steps below to complete the entry:
7a. Choose the email bubble.
7b. Click “OK” to go to the next screen (this step is not included in the second example. Slip to 3).
7c. Keep this bubble selected.
7d. Give the address book entry a name.
7e. Drop this down to match the first letter of the name you chose.
7f. If you want the entry to show on the favorites screen, check this box.
7g. Type in the email address you want to assign to the entry.
7h. Click “OK” to complete the entry.

